Mobile Automation
Mobile Automation provides support for testing native and hybrid mobile applications (APK), enabling seamless execution of automated test scripts on real devices or emulators. This feature includes capabilities such as app installation, interaction with the app, and comprehensive mobile testing workflows
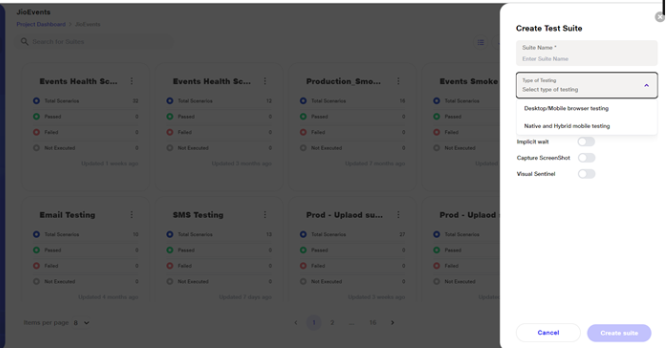
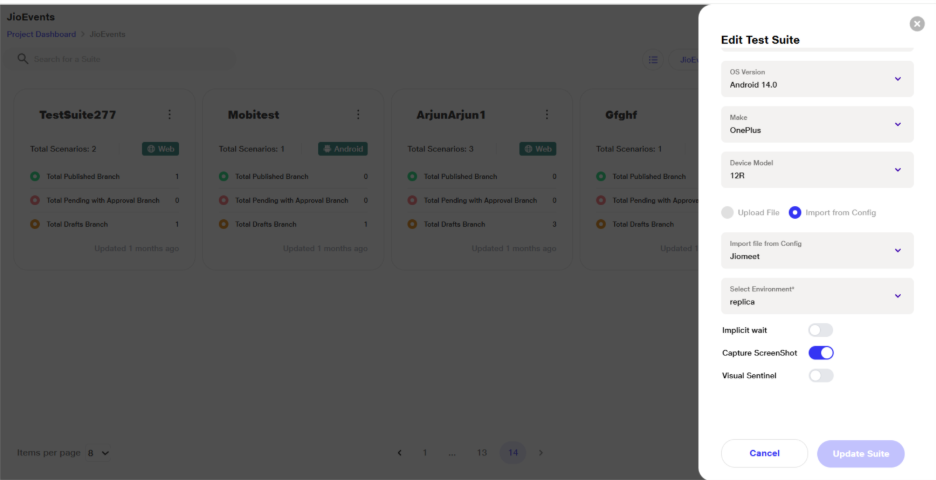
Creation of a Mobile Testing Suite
a. In the Create/Upload Suite flow, under the 'Type of Testing' section, users are presented with multiple testing options. When the user selects 'Native and Hybrid App Testing', the applicable options are dynamically updated on the screen.
b. Upon selecting 'Native and Hybrid App Testing', users are prompted to choose their Device Preference:
i.Options include 'Emulator' or 'Real Device'
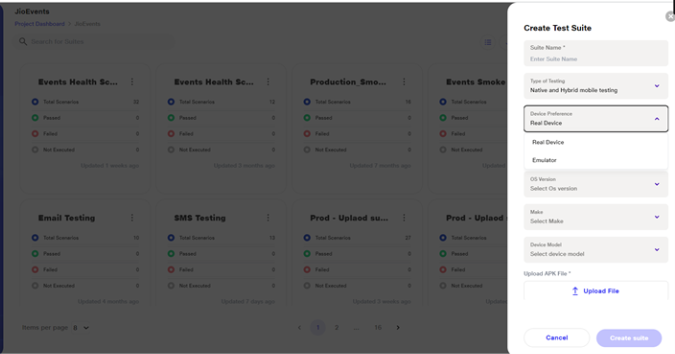
c. For OS Version, Make, and Device Model, the lists are populated based on the selected Device Preference and Operating System.
d. Users can either upload files allowing .apk for Android and .ipa for iOS or import from a config, where they need to select the required file. This file will be stored in the config under the 'upload file' variable.".
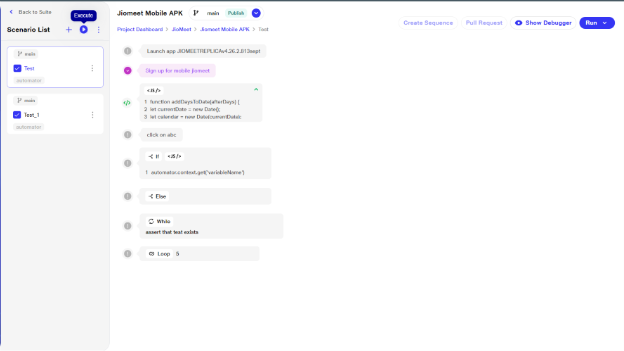
Scenario Creation
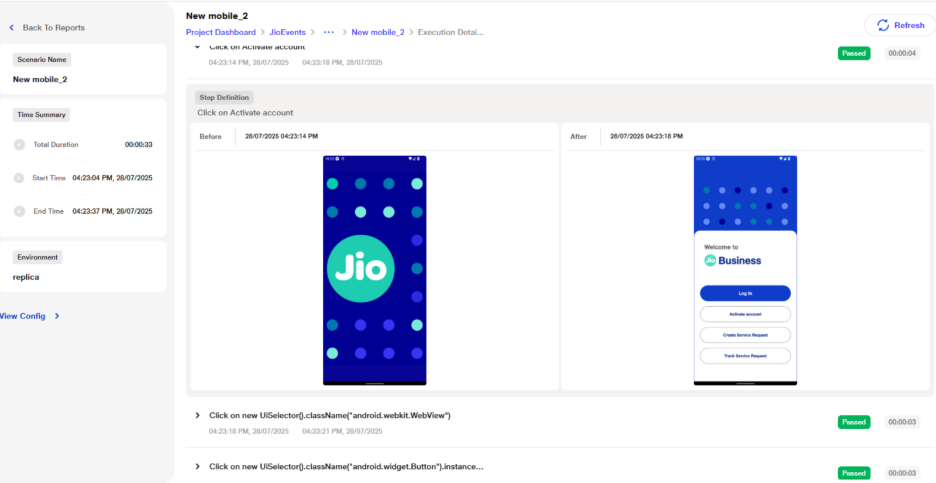
1) Launch app [APK Name]
a)Once a suite is created, users can then create scenarios within it. By default, the first step of any scenario will be the Launch App command, which takes the format of Launch app [APK Name] (e.g., Launch app MyJio).
 b) Once the app is installed, the home screen of the app will be visible, and users can add further scenario steps and continue testing the application.
2) Opening Pre-Installed Applications
a) To open any other pre-installed application during a mobile test case, type the following statement in the Step Input field: Activate app <package name>
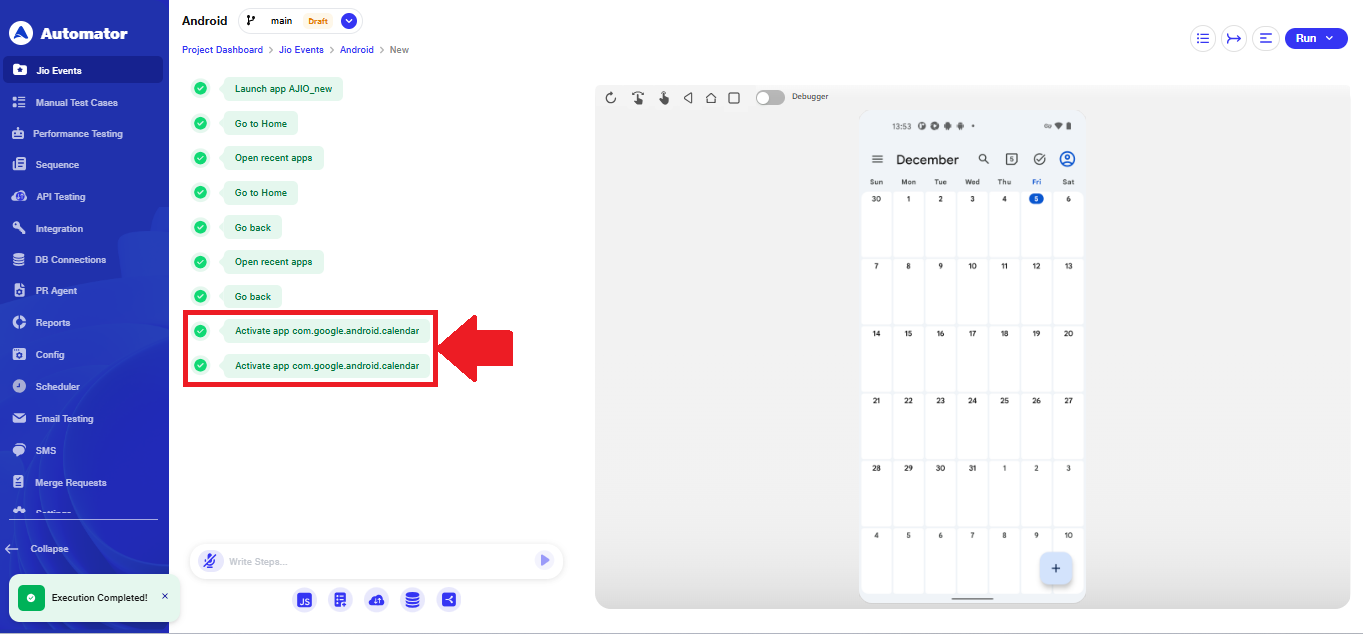 b) Replace
 <package name> with the actual package name of the application you want to open.
JioAutomator and Browserstack Providers
The mobile automation feature in Automator supports two providers for testing:
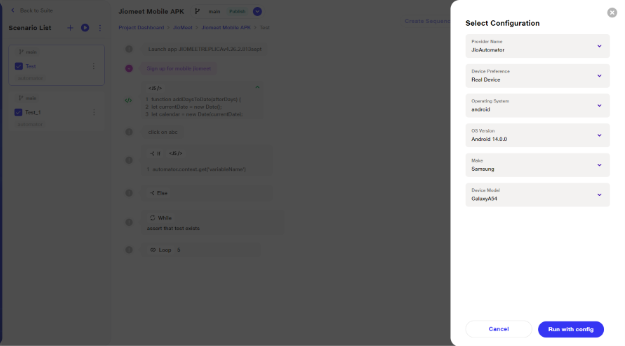
1) JioAutomator:
Allows test case development and execution using both emulators and real devices. Only Android device are supported on JioAutomator
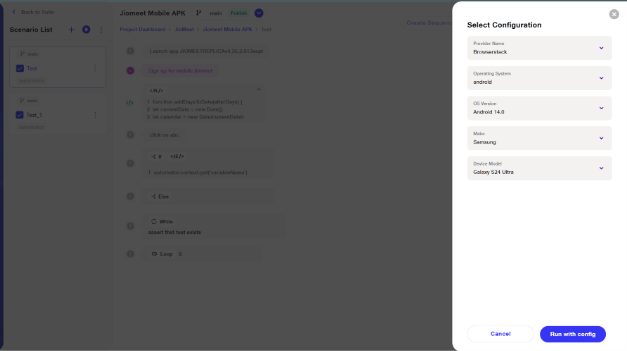
2) Browserstack:
Supports execution on real devices only, providing thorough testing across real-world environments. Android and iOS devices are been supported through browserstack
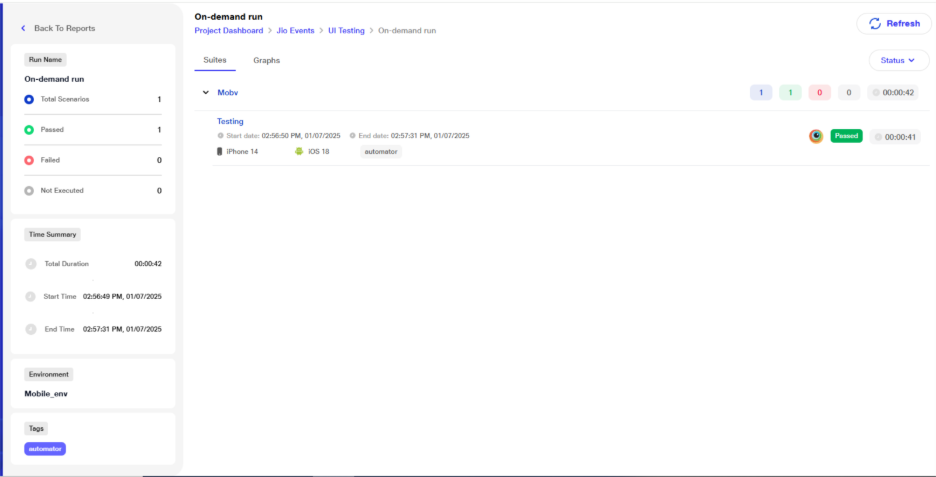
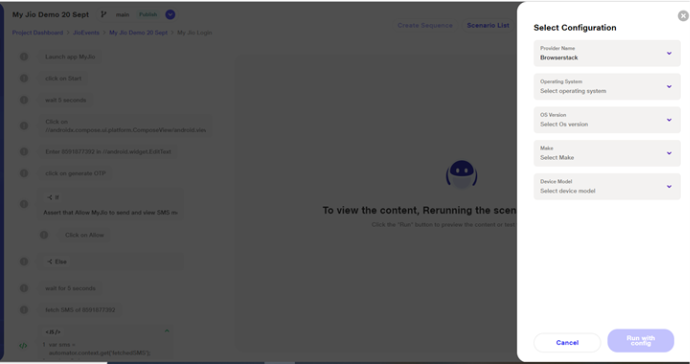
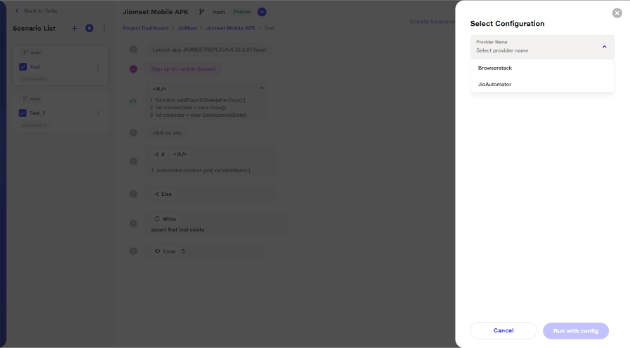
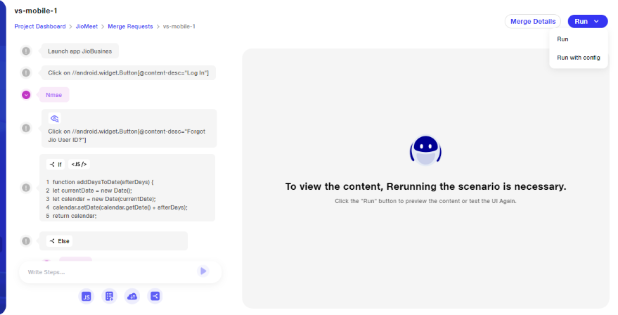
Running Scenarios
Users have two options to run their scenarios:
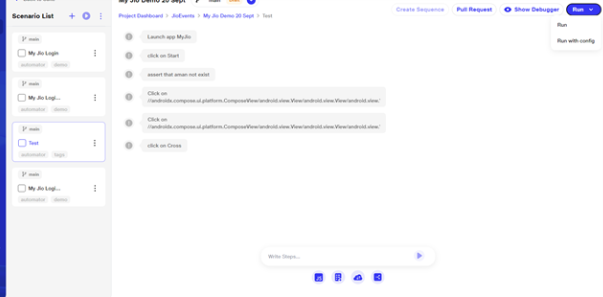
1) Run: Run the scenario using the default configuration set during suite creation.
2) Run with Config: Allows the user to select between JioAutomator and BrowserStack as the provider. While using this option, the user cannot change the OS , it will remain the same as it was at the time of suite creation. However, the user can change the OS version, device make, and device model.
i. With JioAutomator, scenarios can be executed on emulators and real devices.
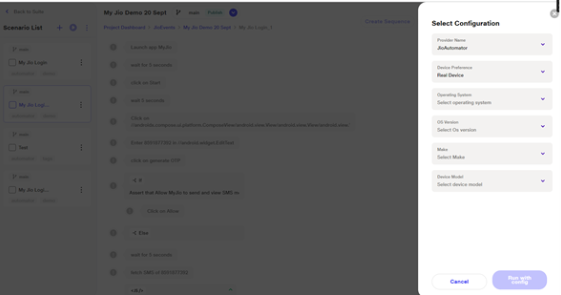
ii.With Browserstack, scenarios can be run only on real devices.
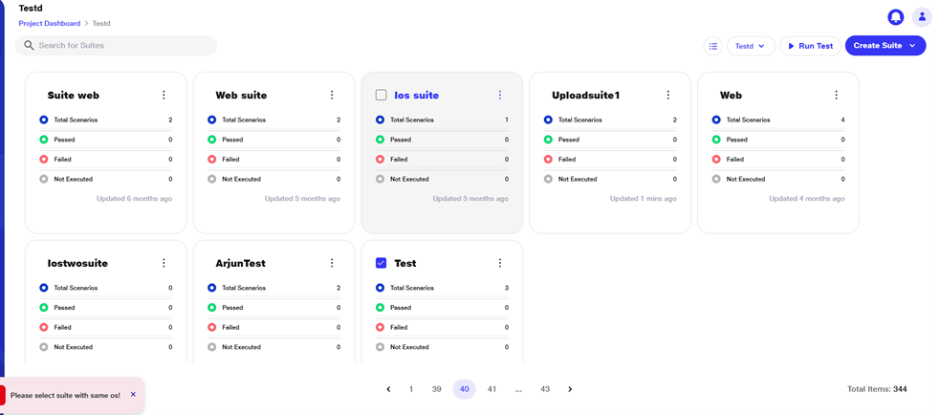
Multiple Suite Execution
a. Users will have the flexibility to run multiple suites simultaneously. If the user wants to execute mobile suites, they should select suites with the same APK in the configuration and execute them.
b. For executing web suites, the browser configuration should be selected individually for each suite.
c. If the user tries to select suites with different APKs, the selection will not be allowed, and an error toast notification will appear.
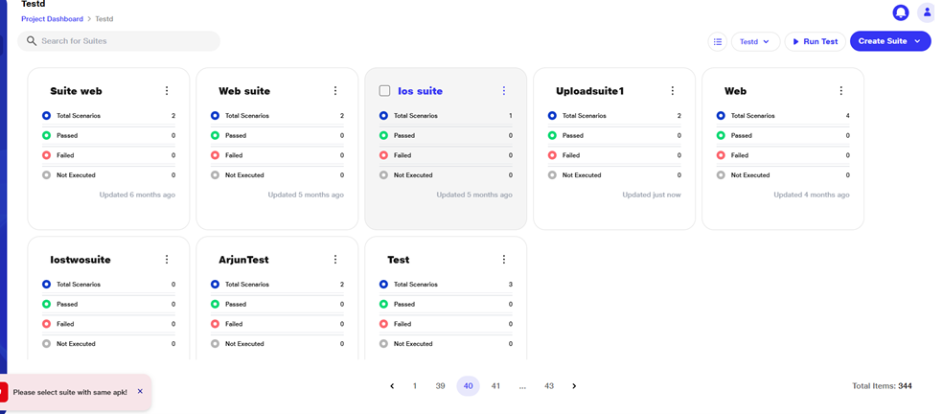
d. If the user tries to select both web and mobile suites together, the selection will not be allowed, and an error toast notification will appear.
Multiple scenario execution
a. Enable the checkbox and click the execute button. You can select and execute multiple or single scenarios.
b. Users will now have two configuration choices: JioAutomator and BrowserStack.
i. Upon selecting BrowserStack, the user can choose from the available devices based on the selected OS version. Click on 'Run Config' to start the execution.
ii. Upon selecting Automator, the user can choose either an emulator or real devices. Available devices will be displayed based on the selected OS version. Click on 'Run Config' to start the execution.
Run config in merge request
Once a pull request for a mobile scenario is raised and the approval process is complete, reviewers have the flexibility to modify the run configuration before execution. This means they can change the device settings, opting to run the scenario on a different physical device or on an emulator, depending on their preference. This allows for greater control and adaptability in testing environments, ensuring the scenario is executed on the most suitable platform.
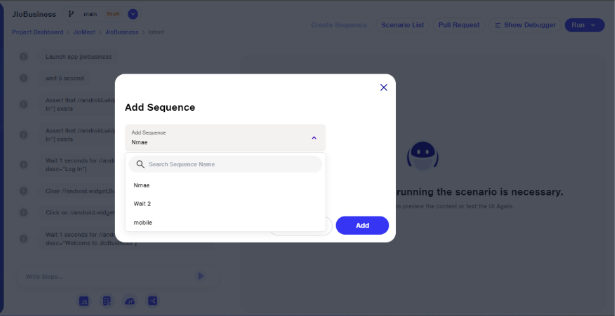
Sequence of mobile testing
In mobile scenarios, when adding a sequence, the user will only see the mobile sequence list.
By clicking on the Sequence module, both web and mobile sequences will be visible. However, users cannot use mobile sequences in web scenarios and vice versa.
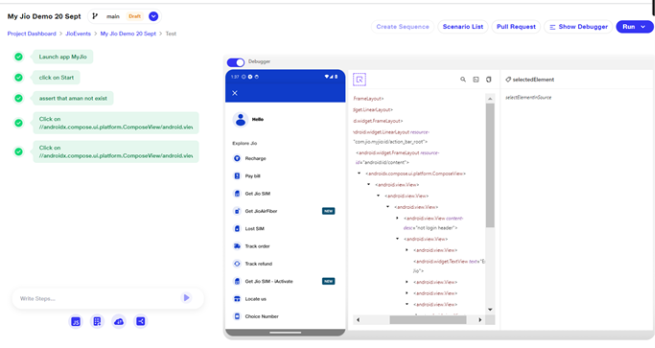
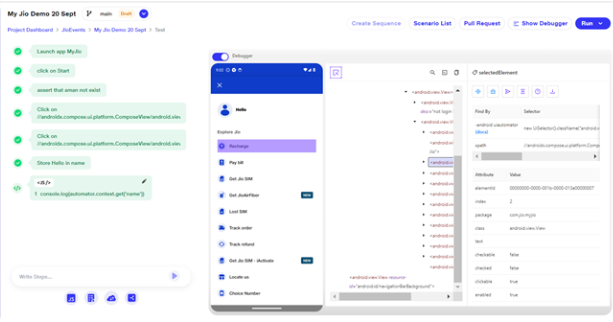
Inspecting Elements in Mobile Automation
a. When the debugger toggle is enabled, a new debugger window opens beside the main window. The user can inspect elements by using the top-right button in the debugger window.
b. When an element is selected in the preview window, the corresponding source of that element will be highlighted in the debugger window.
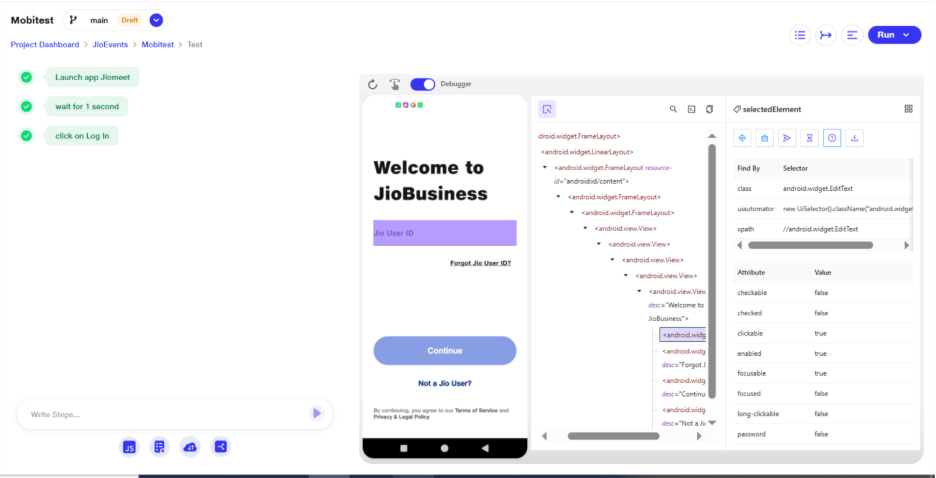
c. Refresh and swipe functionality button are available beside the debugger button
i. Refresh button can be used to manually sync or reload the latest data
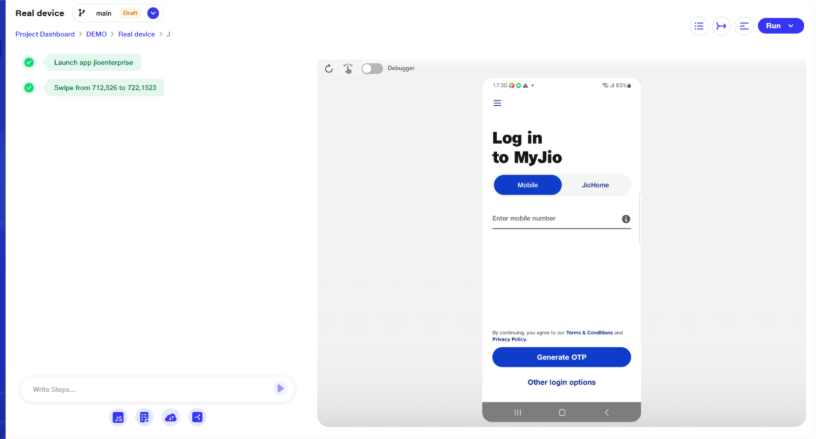
ii. Touch & Swipe Funtionality : Tapping the swipe coordinator icon (beside debugging) enables the user to draw a swipe gesture on the screen.
1) Auto & Manual Swipe Step Creation: Users can either draw a swipe gesture to auto-generate a step (e.g., Swipe from startX, startY to endX, endY) or manually define it using coordinates.
2) Swipe Coordinator Interaction: Tapping the swipe coordinator icon enables swipe mode; after each swipe, it auto-deselects and must be tapped again for the next action.
3) Smart Swipe Direction Detection: The system intelligently detects whether the swipe is horizontal or vertical based on the drag's inclination, including diagonal gestures
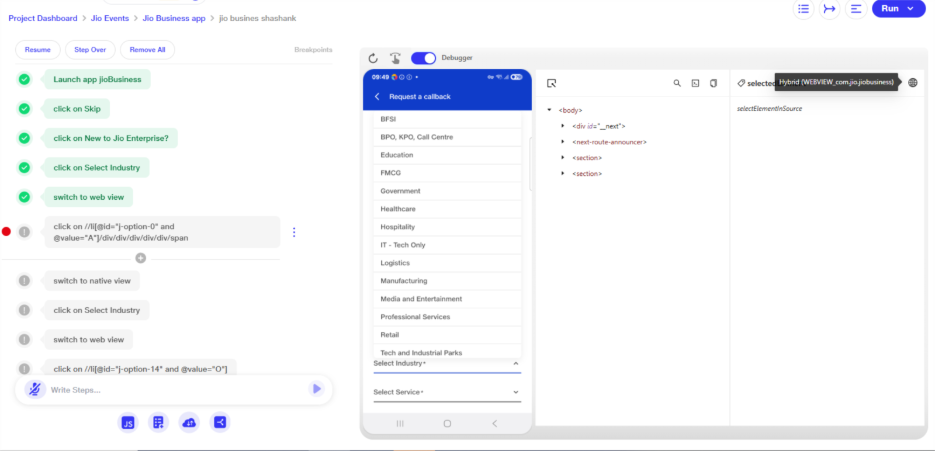
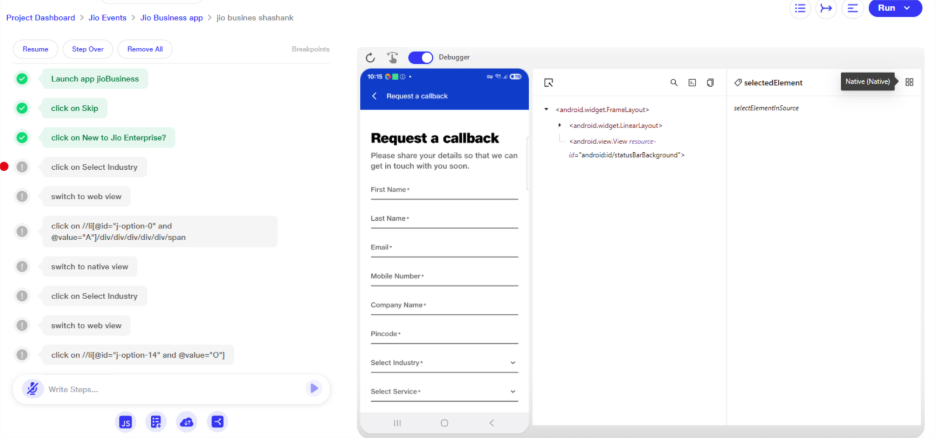
Hybrid App View Switching Support
a. This functionality enables automated testing of hybrid mobile applications by allowing seamless switching between native and web views.
b. Users can insert specific intents—"switch to web view" or "switch to native view"—to shift contexts during test execution. If the application is not hybrid and a web view switch is attempted, the step will fail and in reports error message 'Couldn't found the webview for this app' will appear.
c. The user can identify the current view (native or web) by enabling the debugger screen. On this screen, when the user hovers over the top-right corner, the active view type will be displayed.
Adding Steps Using Contexts
a. When an element is selected from the preview window using Inspect Element, the details of that element are visible on the Selected Element page. At the top, users have six options to create steps:
1) Create a Click Step : Tap on a button or element by its identifier. Example: Tap on element with id "login_button"
2) Clear : Clear the text from an input field. Example: Clear text from element with id "search_box"
3) Create a Write Step : Enter text into an input field. Example: Type "Jio" into element with id "username_field"
4)Wait for this Element : Wait until a specific element appears on the screen. Example: Wait for element with id "dashboard_icon" to appear
5) Assert : Perform validations on the UI elements:
i.Assert Exists – Check that an element is present. Example: Assert element with id "home_banner" exists
ii. Assert Not Exists – Check that an element is not present. Example: Assert element with id "error_message" does not exist
iii.Assert Equals To – Validate element text/value equals expected. Example: Assert text of element with id "greeting" equals "Welcome"
iv.Assert Not Equals To – Validate element text/value does not equal unexpected. Example: Assert text of element with id "status" not equals "Failed"
6) Store Save the value/text of an element into a variable for later use. Example: Store text of element with id "order_id" in variable "orderNumber"
These options will only appear when the Inspect Element feature is in use. Users can select any element from the preview window and add these steps accordingly.
Available Statements (Intents)
In Automator, test steps are articulated in natural language and can be enriched using a simple English syntax..
Automator leverages artificial intelligence to translate test steps into instructions that communicate with web elements.
- Wait
To add delay Explicitly, use the below wait statements
Examples -
Wait for 5 seconds
Wait 1 minute
- Wait For -
To add a delay or wait for an element to be visible on a page, use the wait commands. You can express intervals in seconds and minutes and the system will automatically convert them to the standard unit of seconds.
Examples -
Wait for 10 seconds for Sign in
Wait for 20 seconds until the login appears
- Upload Uploads a file to a specified file input field on the page or app. Examples:
Upload the selected file.
Initiate the file upload.
Push the content for upload.
- isEnabled Checks and validates if an element is enabled and can be interacted with. Examples:
Check if Button is Enabled.
See if the button is active.
Check if Element is Enabled
- isDisabled Checks and validates if an element is disabled and cannot be interacted with. Examples:
Check if Button is disabled
See if the button is inactive.
Check if Element is disabled
- isSelected Checks if a checkbox, radio button, or option is currently selected. Examples:
Check if the item is selected.
Verify the selected element.
Assert that the radio button [element1] next to the [element2] is selected.
- Clear Clears the existing text or value from an input field. Examples:
Clear all notifications.
Reset the Email field.
clear search bar
- wifiConnect To Connect a device to a specified WiFi network. Examples:
Turn on WiFi.
Start WiFi connection.
- wifiDisconnect To Disconnect a device from the currently connected WiFi network. Examples:
Turn off WiFi.
Switch WiFi off.
- Relaunch Restarts the browser or application session from scratch. Examples:
Force stop the app.
Kill the app with force stop.
Shut down the app with force stop.
- Swipe Performs a swipe gesture on a mobile screen in a specified direction. Examples:
Slide from a,b to x,z.
Sweep from a,b to x,z.
Trace from a,b to x,z.
Swipe from 712,526 to 722,1523
- getAttribute Retrieves the value of a specified attribute from an element. Examples:
Get attribute value of placeholder from username field
Fetch value of class attribute in schedule a demo
Get the attribute of [element1] left of the [element2].
- switchView Switches between views, such as desktop view and mobile/native view. Examples:
Switch to native view.
Change the display to web mode.
Open the application in web mode.
- notifications Interacts with or verifies notifications on the device or browser. Examples:
Clear all notifications.
Click on specific notification.
- goForward Navigates one step forward . Examples:
Advance to the next screen.
Move forward.
- assertContains This validates that some text or attribute contains a specific value. Examples:
Assert that page title contains Welcome
- getTagName Retrieves the HTML tag name of a specified element. Examples:
Get the tag name.
Fetch the tag name.
- createInbox Creates a temporary inbox to receive and test email communication. Examples:
Create inbox.
Create an inbox for random
- Gibberish Inputs random or invalid text into a field to test validation. Examples:
Enter gibberish in username field.
- getText Retrieves and returns the visible text content of a page element. Examples:
Get text from header.
- fetchSMS Fetches SMS messages received on the test device for verification. Examples:
Fetch SMS.
- alertInput Inputs text into a browser alert prompt when requested. Examples:
Enter name John in alert input.
Type in the input
Fill the input
- fetchEmail Fetches emails from the created temporary inbox for validation. Examples:
Fetch email with subject Welcome.
- ScrollToElement
To Scroll through the page, positioning it at a specific element
Examples -
Scroll the page until the help button comes into view
- Assert Exists -
This Statement serves to validate the existence of an element on a page.
Examples -
validate that create new account exist
Assert that Sign in Successfully exists
- Assert Does not Exists -
This Statement serves to validate the absence of an element on a page.
Examples -
validate that create new account doesn’t exist
Assert that Sign in Successfully does not exist
- Assert Text -
This Statement Serves that an element on a page has a given value.
Examples -
Assert text automator equals to Automator
Assert text {{automator.context.textVariable}} equals to Texts
- Assert Not Text -
This Statement Serves that an element on a page does not have a given value.
Examples -
Assert text automator not equals to Automator
Assert text {{automator.context.textVariable}} not equals to Texts
- Input -
To input values into input fields or text areas, utilize the commands type, enter, or write. Follow these commands with the value you wish to input and specify the target element.
Examples:
write k4nwdh88@qiott.com in email address
type 123 in password
input {{automator.context.version}} in email id
- Click -
To interact with an element through clicking, you can use the synonymous of clicks as tap, hit, etc
Examples:
Click on the Sign in button
Tap Search
Hit privacy policy
click on //input[contains(@class, 'p-inputtext')]
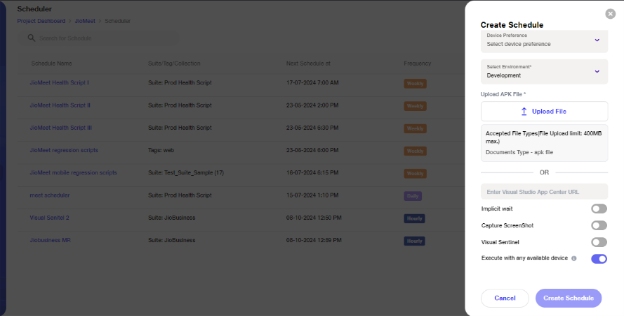
Execution of available devices with Scheduler
Users can schedule mobile automation scenarios (ensure the scenarios are in the published state). Click on Create Scheduler and select Mobile Testing. Choose the scenarios you want to execute, upload the APK, and select your device preference.
Toggle 'Execute scenario with any available device.' If the selected device is unavailable at the time of execution, the scenario will run on any available device.
Mobile scenarios can be executed either on an ad-hoc basis or at a scheduled time.
Integration with BrowserStack
Only the project lead and admin have access to enable integration with Browserstack. This option is visible on the Third Party Integration page under the settings menu.
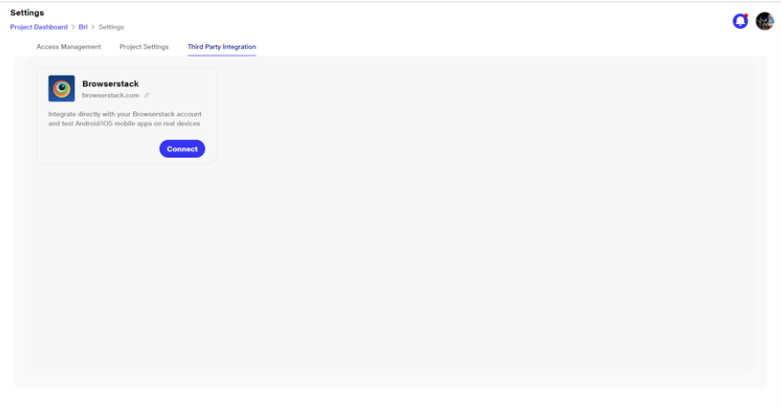
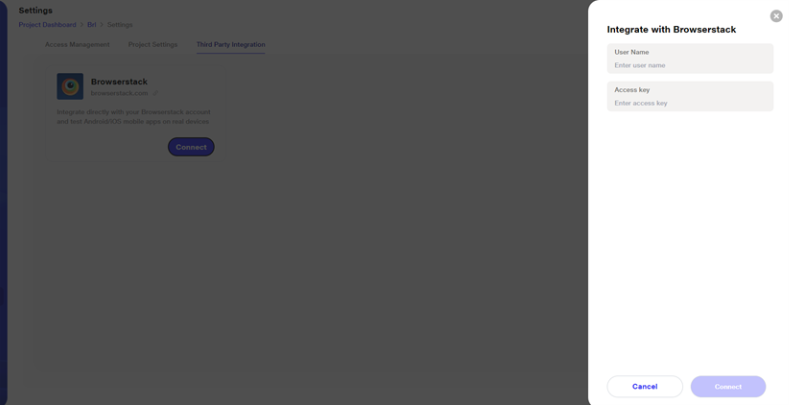
Clicking on Connect opens a new window where the user needs to enter their username and access key from the Browserstack website. Once connected, users can test Android mobile apps on real devices from Browserstack.
Scenario run with browserstack as provider will have Browserstack icon for each scenario. On click of it, user will be redirected to e which will open up in new tab